Tuesday, December 7, 2010

Recent update

Many friends asked me how come I am silenced for so long? Why no post at all? Even less album is published in facebook.
Actually I am still taking photos everywhere. Just that I've met my bottleneck:

How can I improve my shots?
What is my best field in shooting?

I don't know how do others managed it, but I'm stucked in the same situation for a long long time. No improvement in skills, composition, colour managing, and style. Noticable improvement in getting sharp image(due to 50mm F1.8 lens??), focused on target, sometimes getting the correct white balance of the photo. Throughout the shooting in this few months, I've oso noticed that I am weak in landscape photography, and many things which are not moving..

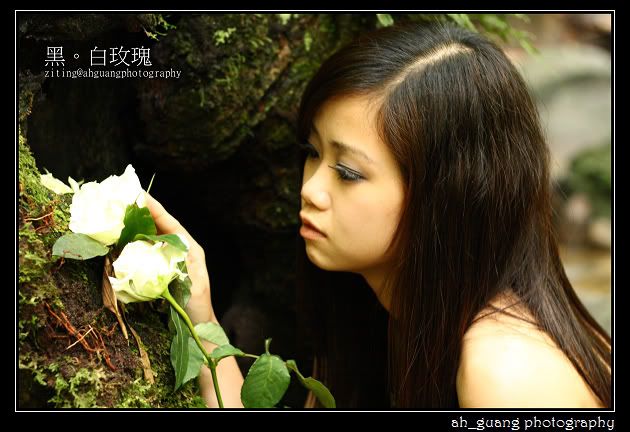
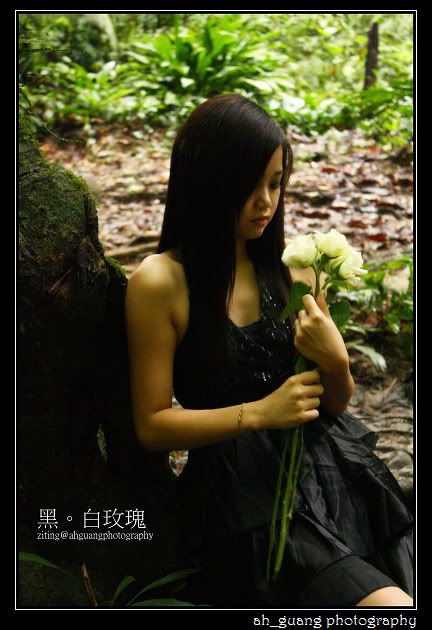
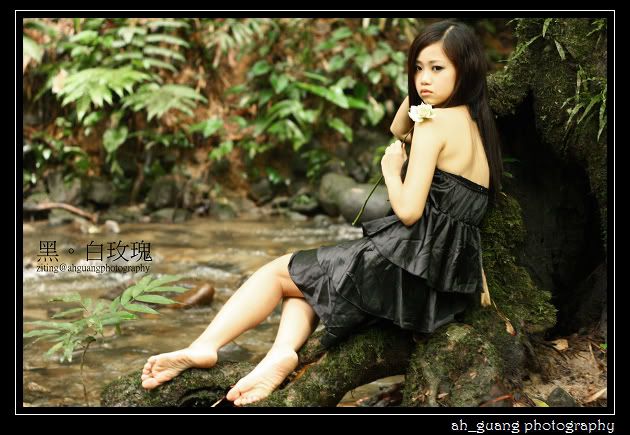
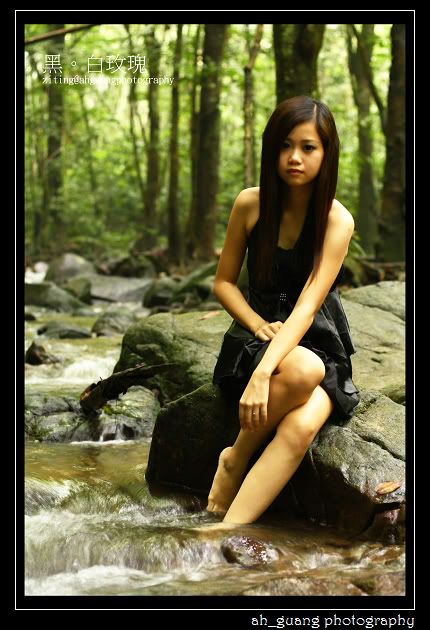
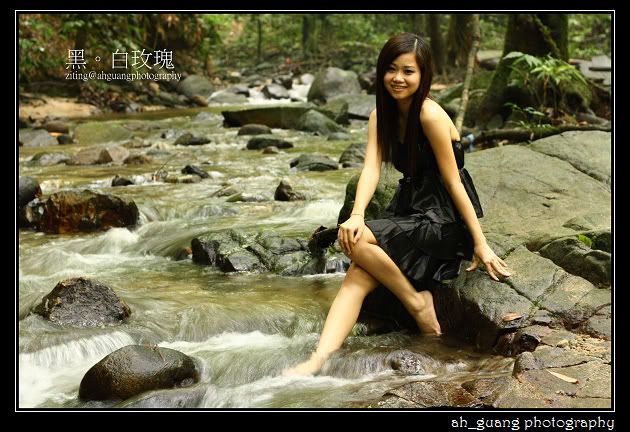
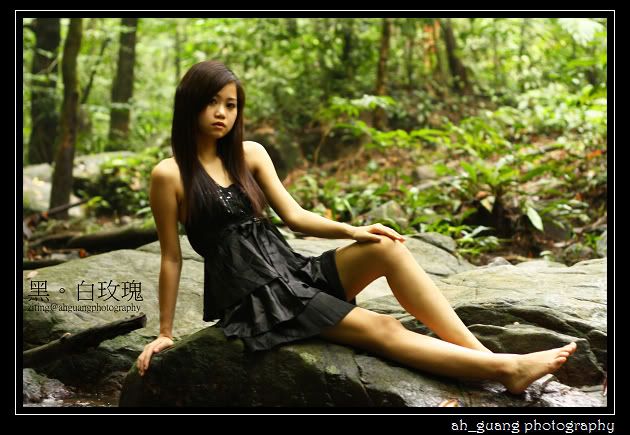
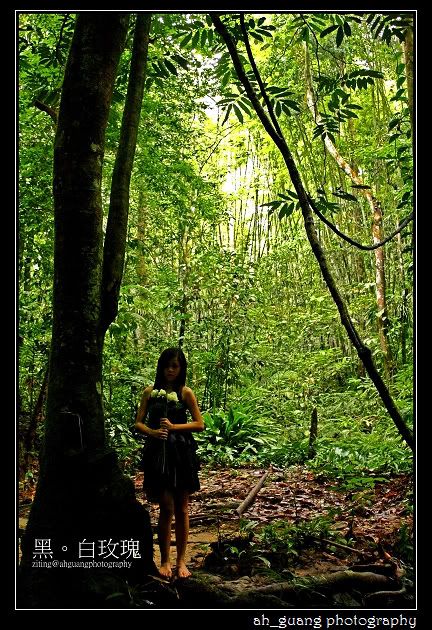
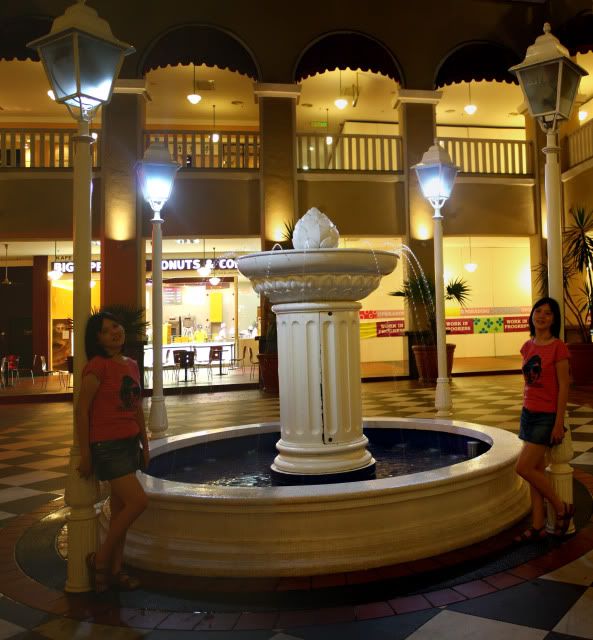
Some photos to share, taken long long time ago(credit to the model, Ziting):
1. Album Cover
Photobucket

2. Close up
Photobucket

3. Photobucket

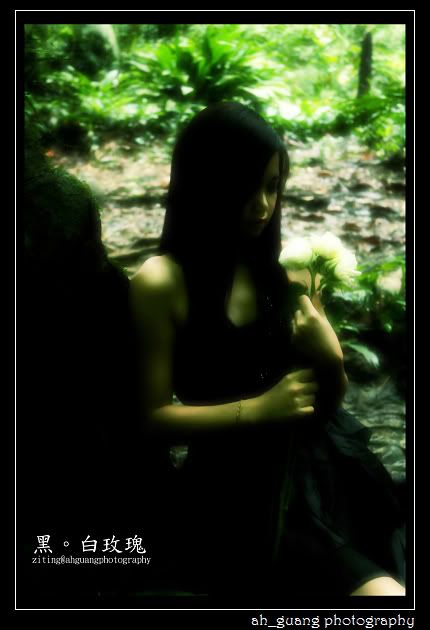
4. A photoshop-ed photo of no. 3
Photobucket

5. Photobucket

6.Photobucket

7.Photobucket

8.Photobucket

9. Last photo
Photobucket


Most, if not all photos were shot using 50mm F1.8 lens. I like the lens very much. It offers me the sharpness I wanted. Ziting, the model did much of the job. She herself posed for the shots and I only commented on a few shots.

Read more...

Monday, August 30, 2010

What is the meaning?

Again, long time since last post. Maybe this one shouldn't be a photography blog. It should be a photo-blog instead. I am too new in photo shooting, i cannot call myself a photographer. I am only a "photo-taker". I take photo. Simply taking photos everywhere. And I care too much about composition, angle, exposure, colour balance and object (well, not that I can take of that much things, just as example :-p). At the end, I forgot what a real photo means.

WHY do I take this shoot?
WHAT am I trying to show with this shot?

I don't know. I am just shooting to show the beauty of the object. There's no point of me shooting this photo. I am in deep shit...

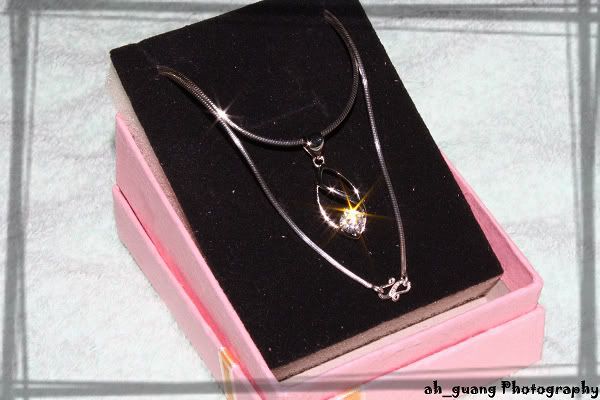
It took me at least half an hour and 50+ shots to get this photo. A necklace i bought for my girl friend as her convocation gift. Yes it is nice. However, it is supposed to be warm and sincere.Yet it looks cold and heartless. Don't you think so?

Photobucket


For her convocation, I purposely brought her out one day to take her photo in her robe before she returns it. 128 shots. For me there's no perfect shot of the day. One of the better shots:

Photobucket


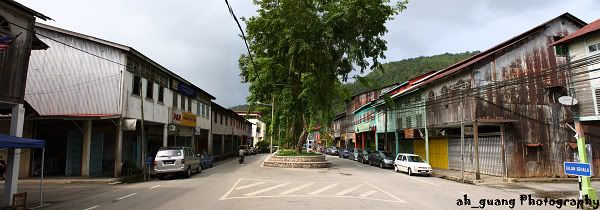
Following trips to Sg. Lembing and Cameron Highlands, I took panoramic shots again. Same mistake, same boring.

Sg. Lembing town main street panorama:

Photobucket

I should have included the top of the tree in the middle, and also the horizontal line.


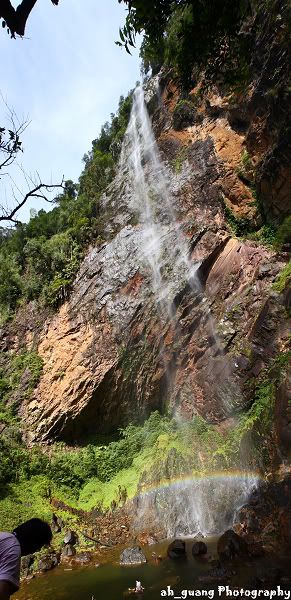
Rainbow waterfall at Sg Lembing:

Photobucket

a nice shot, but not a perfect shot.


Cameron Highlands' Boh Tea Farm:

Photobucket

The white balance of the photo ran again...


What can I do? How can I learn?

Read more...

Wednesday, March 17, 2010

Panorama photo

Hasn't been taking photos lately, other than a few gathering photo. But I am never a gathering-photographer type of person, I usually hand-off the duty to my friends. Haha.. Still, outing to Lookout Point, Cheras did resulted into something, well at least to me. We went for dinner in a restaurant called Panoramic View, and we get to view the panoramic view of KL. Took a few photo, came back and I used Photoshop CS3 to stitched the photos into a panoramic photo.

OK, what is panoramic view?
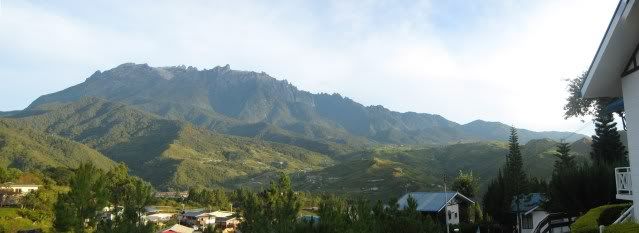
According to Wikipedia, a panorama is the wide-angle view of anything. It can be in painting, photography, drawing, and movie/video. I first encounter the word in photography. And indeed, I took my first panoramic photo a few years ago during my trip in Kota Kinabalu, Sabah. The subject I shot is Mount Kinabalu. It was taken using the family's old Canon Ixus 850IS, and i did'nt stitched the photo until lately. Here's the result from stitching three photos:

Photobucket

How can you take a panoramic photo?
Well, you can always buy a real panoramic camera, or you can do post-production using software like Adobe Photoshop.
For post-production, you will need to take some photo and stitch them together. For some models of Canon DC, there's already a function named 'stitch' when you are using manual mode. If there's no such function, feel no fear as ahguang is here. Tripod is very useful here as u can take multiple shots from the same height and spot, with more steadiness. The trick here is, if you are using a DSLR or prosumer, switch to 'M' mode, set the appropriate shutter and aperture for all shots. This is important to keep the exposure same. Then take a first shot, adjust your camera so that the second shot must overlap about 1/3 of the view covered in first shot, the third shot overlap about 1/3 of the second shot and so on until you covered the whole view.
Next, use your post-production software. I'd only tried Adobe PS3, so I can't comment much on the software, but its quite easy to use. Open your software, click 'File' >> 'Automate' >> 'photomerge', then select your photo, then click 'ok'. Just that easy and the software will do all the dirty work for you.

Here's the KL panoramic photo produced from the outing:

Photobucket

The photo is too long as it's stitched using four photos. Too bad too the most left and right side of the photo is blurred due to shaky camera when taking them. Must take better shots next time..

Stitching photos can also be used in some other creative situations. One of the example is as below, which is partly a failure:

Photobucket

I've seen some perfect portraits, examples here and here (from http://blog-blogsss.blogspot.com/) produced by stitching photos together, but mine above is surely not one of them. The exposure is different from left to right if you have noticed..

Hope you will enjoy stitching photos!

Read more...

Saturday, February 27, 2010

Event Photography too

Attended another event last wed with my gal gal. It was a concert where the UM students write, compose and sing their own song, in Chinese of course. Didn't plan to take photo initially, but my hands are itchy and can't stand the complex lighting of the stage thus I went and grabbed my gear, my dear EOS1000D.. Hehe..

Just something to add on to the previous post:

  1. Prime lenses have their advantage in event shooting too.
  2. Be brave and step forward.
  3. Be as invicible as possible.
As mentioned in the post of shutter and aperture, bigger aperture(smaller F values) does reduce shutter lag and thus reducing the blurness caused by motion. During the event, I spoke to another female photographer who also took photo of the event last year. She is using the same camera model as mine, and kit lens last year. This year she is using prime lense (50mm F1.8) instead. Her comment is, using prime lens really helps a lot.
(Sorry but this is a tip for DSLR users. DC and prosumer just can't change lens)
(Just for information, prime lenses are a group of lenses where the focal length is fixed, meaning they can't zoom like zoom lens which can zoom. Prime lens normally have a bigger aperture than zoom lens.)
(Looks like I must own a prime lens soon..)

Be brave and step forward.
If you really wanted to shoot event photographys, getting close is very important. When you go closer, there is more light. More light means shorter shutter speed. And you can focus on each expressions of the performers.

Be as invisible as possible.
This is a reminder from my gal gal. She complaints that I moved too much during the event. This caused a disturbance to not only her, but also the audience around us. I was keep on moving to-and-fro from my seats and the stage and this will affect the audience's attention to the event. What she said is correct. I haven't thought of others feeling when I am enjoying my shooting. They have also paid for the event and they have their rights to enjoy the show without being interference. She suggested to me that I can either stay out taking photo for the whole event, or just sit and enjoy the show. If I choose to take photo, don't move too much too as this might catch the attention of audience from the performance. If I come for the show, just enjoy the show and stop thinking about photography.
Respect your companion too, as they accompany you to the show, not the shooting.

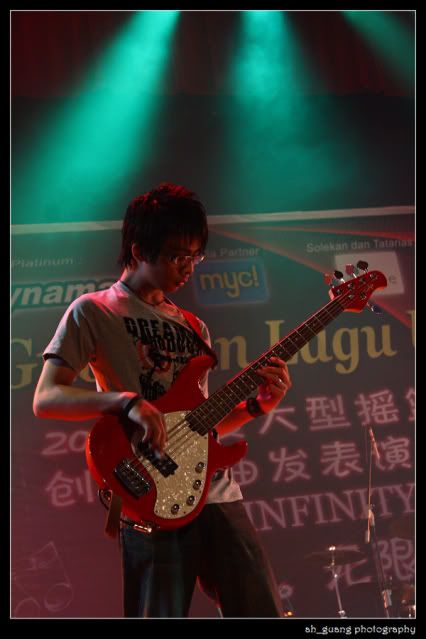
Not much to share, just wanna put the photo of a bassist I know.
Photobucket


And a discussion here:
How can I avoid overexposure on the face of the performers if lights are directly shot onto them?

Read more...

Friday, February 19, 2010

Event Photography

Sorry guys, its already three weeks since my last entry. Too busy(eating, celebrating and shooting) and too lazy... By the way, its Chinese New Year what, who works that hard during this period? Not me.. Haha..

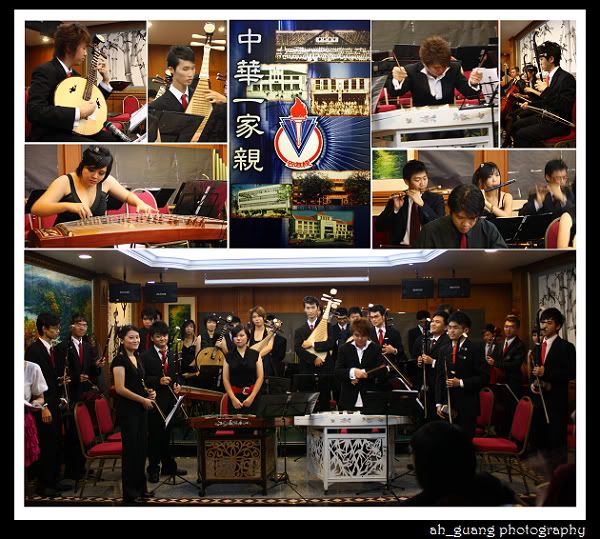
OK, for the past three weeks I have been to two events taking photo. One of them is a paid Chinese instrument symphony orchestra, while another one is Ang Pau Festival of UM 9th Residential College (just a coincidence that I am free that time and in the college). Learned some really techniques there (as I am still a beginner).

In these events, normally the light will be dim and performers are moving all the while. Some useful tips is:
  1. Push up ur ISO to an acceptable level (for me no choice, ISO1600 is the limit of my camera)
  2. Use the fastest shutter speed available
  3. Check the white balance of the stage
  4. Ask for the flow of the event to know the performances coming up
  5. Attend their rehearsal (if possible)(ask for permissions too)
  6. PRACTICE MORE!!!

For details and photo, please click 'Read More'...


Obviously, the 1st and the 2nd tips is to reduce shutter lag. In dim light situation (low light), the only way to achieve an acceptable shutter speed is to raise your ISO. During my 1st shooting, most of the photo were taken using ISO800 as I afraid that raising the ISO up to 1600 will greatly reduce the photo quality. However at the end of the day, most of the photo are blurred due to the continuous movement of the performers (of course la, they are performing what..). The quality is only acceptable, but the precious moment, timing, where the performers looked best are missed.

Either image quality or 'the moment'?
I will choose 'the moment'...

For the 1st event most of the photos are blurred. So I've only selected a few to crop into one.

Photobucket

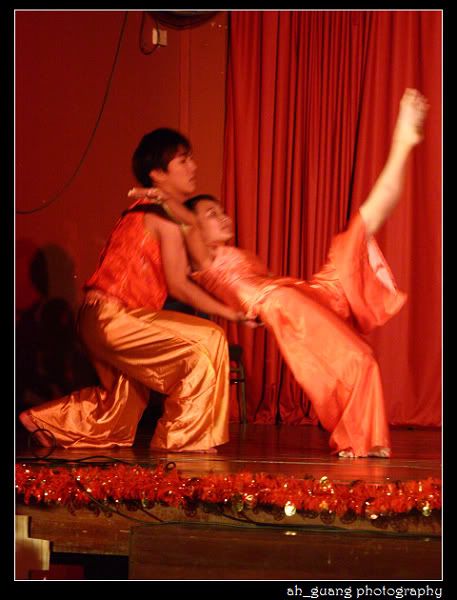
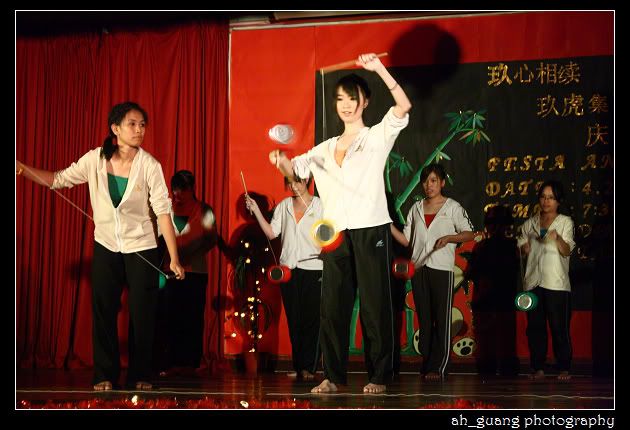
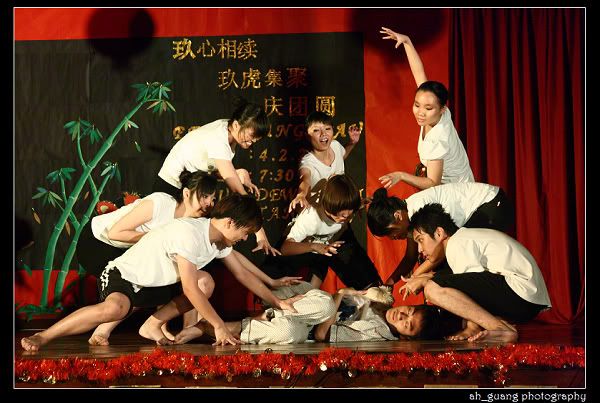
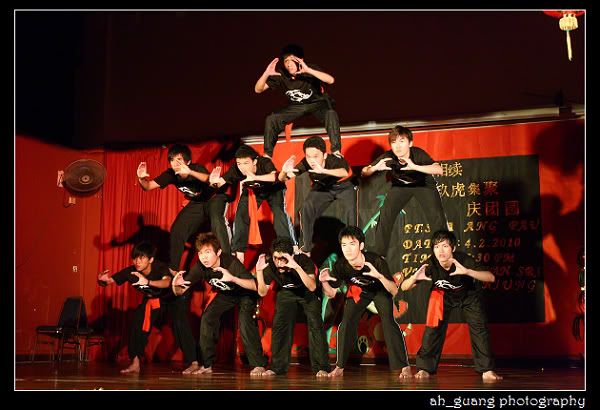
During the second event, I've choosen to use ISO1600 and this enabled me to use an average shutter speed of 1/30. Although this is still considered quite slow, but it is far better than the previous event(S.P. of 1/8). Here are some of my more favourable shots during the second event, with some sense of 'the moment'..

Photobucket
Hero saving beauty.. Blurred a bit dy..

Photobucket
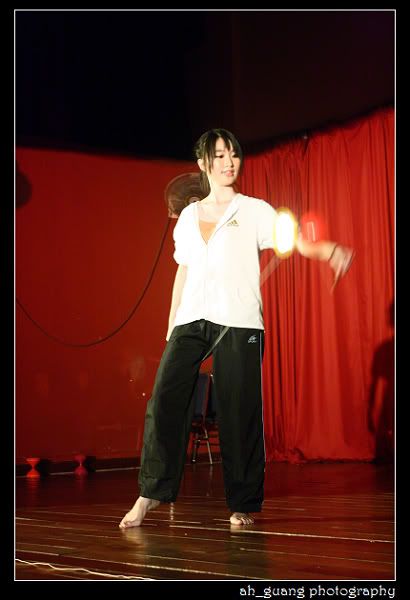
Left girl throwing a diabolo to the right girl who already holding one diabolo

Photobucket
Mosquitoes surrounding a peacefully sleeping boy..

Photobucket
Human Pyramid as if they are asking people to take photo of them...

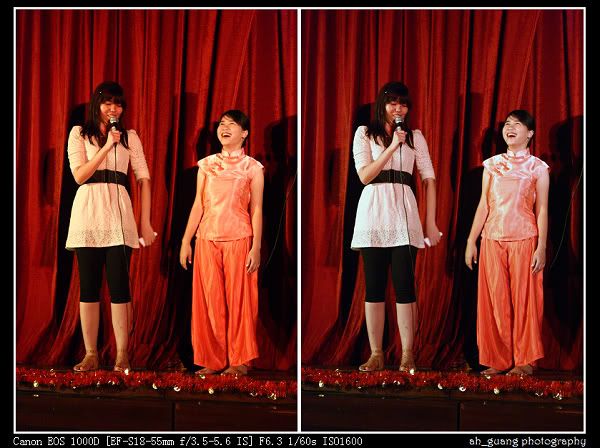
About white balance. I have'nt mentioned this in my previous post, but this is quite important as white balancing will fix the colour bias caused by stage lightings. Most of the stage lights are comprised of several colour like green, yellow and red. When these lights beam onto the performers the original colour of the performers will be changed and become unnatural when viewed. Try comparing the two photos below:

Photobucket
The left was shot without adjusting the WB in the camera, the WB of the right is corrected using 'auto colour' function in Photoshop. Can you see the difference? The left is more reddish while the right is corrected.
WB may seems like a minute thing to take care of, but it is important thing to be noticed in achieving a good image.
A reminder here is, WB can be adjusted from the camera, or post processed using software. But the a better image quality can be obtained if adjustment is done using the camera.

The 4th and the 5th tips are quite similar. If you get to know the flow of the event, you gain an advantage which is, you get to know when is the best time to get an impressing shot of a performance. During the 2nd event I attended, one of the hardest performance to shoot is the diabolo performance. You'll never know when is the best time to press the shutter if you do not know well about the performance. The essence of a diabolo performance is when the performers throw 2-4 diabolos at a time without dropping any; or throwing up a diabolo 2-3 meters above the ground. Miss the moment, then you'll miss the shot, FOREVER. That's why knowing the performance (or best, attending their rehearsal in advance) is the best way to capture a great event photo.

Photobucket
It tooked me some while to take photo of this...

The final tips, well, I think I don't have to elaborate on that. Practice more! Hehehe...

Event photography is a very interesting part in photography. It really requires thinking and observing. Unlike portrait/macro/scenary, capturing the moment is the most important aspect. And another thing is, event photography is also one of the most money-making photography as there are always event out there waiting and employing photographers(especially wedding photographer). Practice well, and it can be an additional income for you too!

Gong Xi Fa Cai to all too!!!

more photo here:
http://www.facebook.com/album.php?aid=2052548&id=1436539115&l=ab02810383

Read more...

Sunday, January 31, 2010

Pre-event photo..

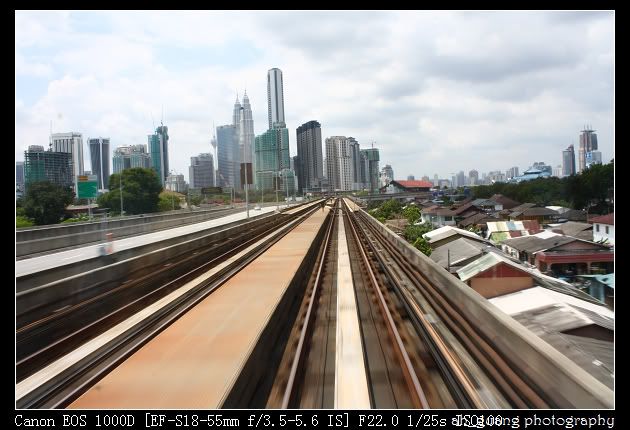
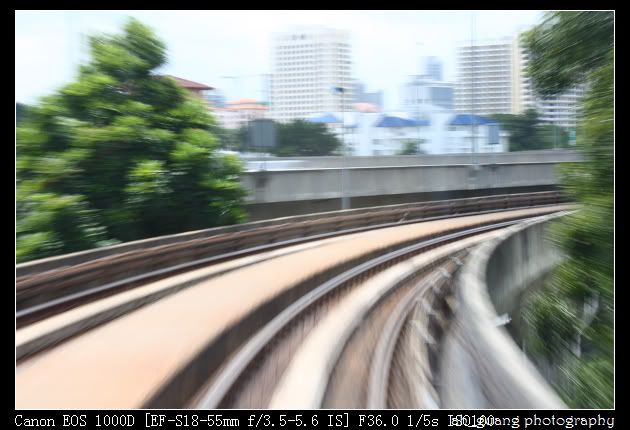
These are some photo I took during the journey to the Chinese Musical Instrument Performance near Setapak. Just some photos that I've longed in taking it, taking a photo of the view at the back of an LRT. Its nothing much interesting about the photos, just wanna post it on as a memory. You can skip this post by not clicking the "read more" below...


This post is quite related to shutter speed. When I first have a real conscious about photography, I visited a photography forum in chinese.cari.com.my, and fascinated by a photo taken at the back of LRT. Since then I have been longing to take such shot and today I tried so..

Here's a dull photo, did not show any motion.
Photobucket
Shutter speed too fast, freezing every movement.. Some more the level is tilted. The left side is higher than the right side.

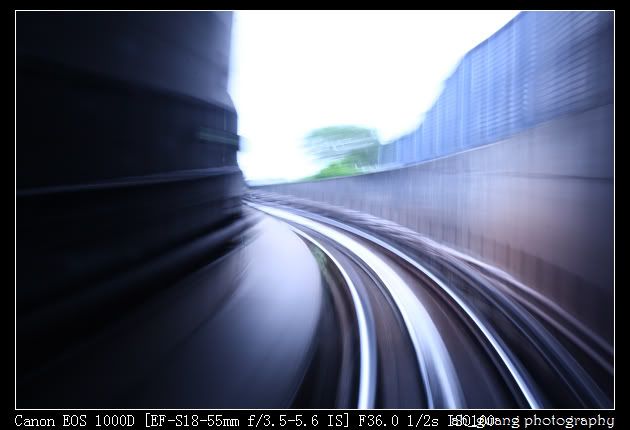
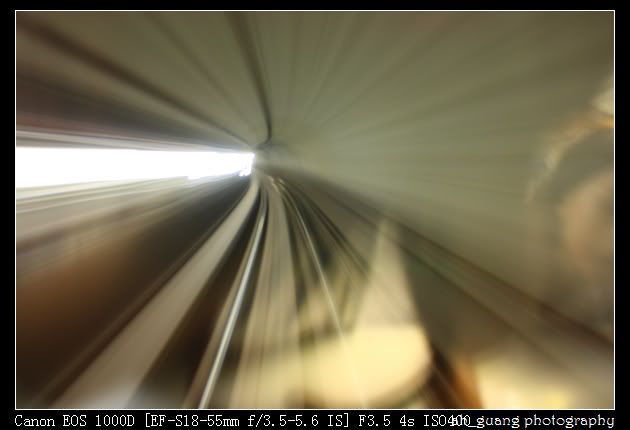
Then I tried several other shots. These are some of the interesting ones..
Photobucket
Overexposure(photo too bright), without any details from background. Yet I like de sense of movement inside.

Photobucket
Moving into a tunnel. With a curve, the photo becomes more attracting.

Photobucket
Inside the tunnel. Too bad reflection of view inside the train was taken too on the window.

Photobucket
This one, I like the curve too. And the feel of expansion. But hand-shake blurry is clearly observable.. The train is too shaky.. haih..

Hope you enjoyed de photos!

Read more...

Saturday, January 30, 2010

Motion blur, camera shaking and out of focus

Sorry for this late post about photography knowledge. Been busy lately… Just FYI, I will be going to an event shooting this Sunday at Setapak. It’s about a musical festival, but the details I am not very sure for now. Feeling exciting about it as it’s my 1st paid shooting… Hehe…

Ok, lesson for today is blurriness in photo.

I know I know, most of u know how to take photo and u know about blurriness, if the photo is blurred, then it means something wrong and then u re-take de photo again. Then it blurred again. Then u shoot again until u get something u satisfy when u check in the little LCD screen of your camera. But then when u view it in your computer, the photo is blurred!

Why is this happening? Well, because u didn’t trouble shoot correctly. Do u know what’s wrong in the photo? And how can u improve the quality of the photo?

Other than during outing, most of the people take photos during low light situation, for example, in door party. When u’re shooting using digital compact (or even higher level camera), there r some limitation of the camera, your technique, or a combination of both. Blurriness in photo can be due to three main reasons, which is object’s motion blur, camera shaking and out of focusing.


Obviously, motion blur are referring to the motion of the object causing the blurriness in the photo. This may be due to fast movement of the object or long shutter time. In long shutter time, even the slightest movement of the object can cause an obvious blurriness in the photo. Camera shaking will also cause blurriness in a photo. It is common than human’s hand would shakes and normally when the shutter speed is longer than 1/30 we tends to shake when we r holding the camera. It also happens when we r pressing the shutter too hard.

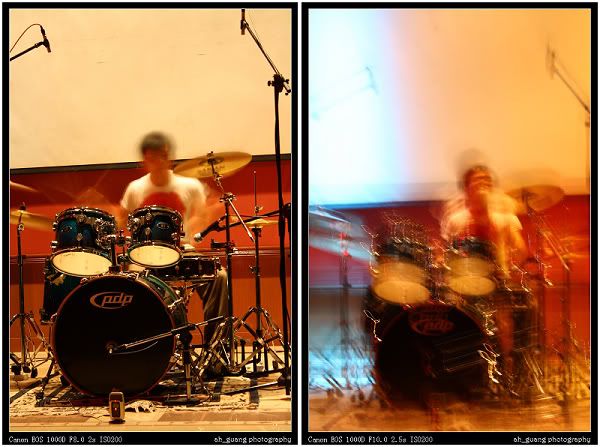
How do we differentiate motion blur and camera shaking? Look at the photo below:

Photobucket

A drummer is hitting his drum rapidly and both photos were taken under low light condition. In the left photo, the drum and other stagnant objects are clearly seen, sharp, without any blurriness but the drummer is blurred. U can’t even c his face clearly. As for the right photo, the whole photo is blurred and u can notice that the blurriness of all objects has a same direction.
Well I think u might have guessed it now, the blurriness in the left photo is motion blur, while the right is due to camera shaking.

Now we knew what caused the blurriness, how can we reduce such blurriness?

For motion blur, use a higher ISO/shorter shutter speed or simply ask the object to stop moving (if situation allows… T.T)
For camera shaking, use a higher ISO/shorter shutter speed/switch on the image stabilizer or similar function on your lens if u r using Prosumer or DSLR/hold the camera the correct way/use a tripod/lean against a stable support if without tripod/ask someone with a steady hand!
One more common tip, USE YOUR FLASH!!! Although I normally don't like the effect of using flash. It spoils de mood and ambience of the photo.

For more details, u can refer to previous entries about ISO and shutter speed.

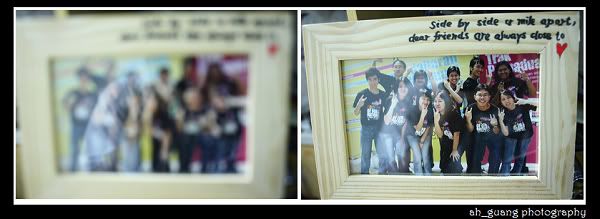
Let’s compare the next two photos and c if u can notice which kind of blurriness it is.

Photobucket

The left photo is blurred due to out of focus. Although almost all cameras have a function known as auto-focus, but in situations where the contrast between the object and background is not big (due to low light situation/complex colour/object is not outstanding compare to background) the function might not be working properly. Some users also never check the focus point of the shots or do not even let the camera having the time to focus.

For DC/Prosumer users, most models now will focus when u half press the shutter. Normally u would hear a beep/deed sound when the camera locks its focus and a box showing the focus point will appear on the screen. Check if the camera had got what u want to focus on. Release the shutter and half-press again to focus again until the focusing is correct then only fully press the shutter.
As for Prosumer/DSLR, when the camera is in auto-focus mode, the focus point focused will blink in your view finder. U can switch the focusing to the nearest focus point to guide the camera. If u are using live-preview mode, some additional controls might be required for auto-focusing and it is best to read the camera’s manual for guidance. During manual focus, a tip to achieve better focusing is the zoom to the object and adjusts the focusing. With more practice, manual focusing can be far better and faster than auto-focusing.

It is advised that u check the shot straight after u’ve taken your shots. Magnify a few times onto the object of interest and check whether the image is sharp or not. If not, re-take the shot.

Thank you for your time. I hope u learn something today and take better shots next time!

P/s: would like u all to take some time to leave comments so that I can improve my blog. Critics and suggestions are welcomed. And it would be a pleasure if u can help to answer the survey on the sidebar..


Read more...

Thursday, January 21, 2010

Photography Contest Around

The post for tis week has'nt been written yet. It will probably writing about 'blurness' in photo. How do blurness occur? Stay tuned for tat! Hehe.. Meanwhile, I wil post about some photography competitions tat i discovered lately..

De biggest photography contest i noe for now is the KL Photo Awards.
Prize money is good, $2500 for 1st prize, n de photo entries last year, was'nt tat impressing to me after all. Top 50 entries selected will be printed and exhibited in Annexe Gallery, and the best thing is, u get to take back de printed photo (which i suppose is in BIG size!!!).
There r two categories in the competition, the 1st being single portrait photo, and the 2nd wil be story portrait(meaning submit a group of photos to tell a story). However, there is a price to pay. For individual portrait, each entry is charged $10(max 8 entries), whereas for story, each entry is charged $50. All $ is in USD...
Note: All entries must be received by 2400 hrs GMT on Wednesday, 31st March 2010.


Then i found tat Western Digital, a company reknown for producing hard disc drive(HDD) are also organizing a contest involving photo or digital art. The details can be found here. 1st prize is an Apple MacBook, and there are weekly prizes to be won too. The competition requires u to find the best way the concept of BGB (wat it means? refer to the website). Entries posted are also being uploaded in the website too.
Note: Closing date on 28th Feb 2010.

WWF pula organize a contest tat call for entries. The best thing about this competition is de winner gets to publish his photo in WWF's magazine cover/ used in calendar publishing. Rules and regulations are written here.
Note: The final date for submitting photos is 31st January 2010, 11:59 pm Malaysia Time.

Some of u might even noticed in my advertisement powered by Nuffnang, Milo r also helding the "Milo Fuze Jam-Packed" Contest. Snap ur photo wit ur Milo! Its juz tat easy, then ask ur fren to vote for u, u'l win I-Phone +RM1000 for 1st prize.. hehe..
Note:
The Contest will run from 30/12/2009 at "00:00:01" to 26/04/2010 at "23:59:59"

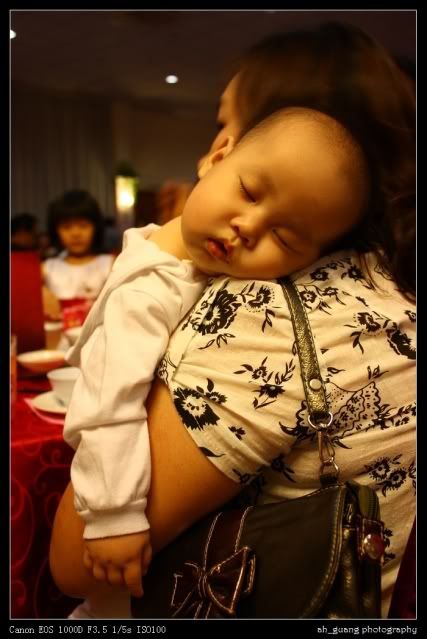
Well, the last one being the one on Facebook, by Canon Malaysia. EOS FACEbulous photography contest, coming out wit 20 themes are open for all fans of Canon Malaysia group on Facebook. 20 themes are available to choose from. Join as a fan of Canon Malaysia, submit ur photo in the theme ur choosed, then ask ur fren to become a fan n ask ur fren to vote for u. Photo wit highest rating wins. (erm, vote for me too, Ong Guang Han in theme TODDLERS)(thanks.. :-P)
Note: Competition closes on 15 Feb, 2010

This is the photo i posted for de facebook competition. A baby sleeping on his mommy's shoulder in a wedding dinner, Kulai, Johor.
Photobucket

One of the main reasons tat I wanted to participate in photography contest, I mean other than the prize money is, these kind of contests drive me to think, to take photo, and to be creative in taking it. As u may haf seen in the entries of some of the contests, almoz all photo wit the same theme wil end up in the same idea/perspective of photo. So in order to win, u muz be extraordinary. And, I wanna WIN!!! So, i participate and i use my brain. Then oni my photography skills wil improve. I hope u would do so!


Read more...

Wednesday, January 13, 2010

Compact? Prosumer? DSLR? Wat is tat?

In my very 1st blog entry i mentioned about having a camera, upgrading a camera into prosumer camera, and finally a DSLR (Digital single lense reflex camera)(or more commonly, the PRO-camera by many commoners... hehe). OK, but wat is all these things?

Most camera-users like to categorize digital cameras into three:

1. normal compact (or point-and-shoot camera)(i prefer the chinese name, silly's camera, more cute.. haha..) (acronymed as DC below)
2. prosumer camera or semi-pro camera
3. DSLR camera or pro-camera

Each type of camera has their own advantage and disadvantage. Althou i am not very clear about it, i wil try my best to explain it.

In simple words:
Photobucket

For details or complete post, click the 'read more' below...


Normal digital compact(DC) are the common camera v normally use or saw ppl using. For example, my family's 1st ever DC is Nikon's Coolpix S3.
http://a.img-dpreview.com/news/0509/Nikon/nikon_cps3sfrontbk.jpg
photo from http://www.dpreview.com/news/0509/05090101nikon_coolpixs3.asp

Ofcoz the obvious advantage of DC is its relatively easy to use. The fully automatic control of the camera ease the user. All u need to do is juz look into the screen, half-press shutter for the camera to auto-focus onto object, full press to take photo and checking ur photo. Not satisfy then u can delete and re-snap. Tats all. Then, the small size of DCs made them easy to be carried evywhere witout the worry of camera weight and size .

Summore now-a-days DC price ranges from 200+ to 1k+, evy1 can buy a camera based on their abilities and requirement. In order to compensate the lack of photography skills among the users, cameras have also been equiped wit several useful semi-auto function, for example the Macro-mode(to take close-ups of small things), Night mode, Portrait mode, In-Door mode.. (if u wanna noe bout diff btw each mode, leave ur comments to tel me bout it..) The higher end of DC also come wit manual mode, where it enables the user to haf more controls on shooting. As far as i noe, some Canon models provide 'long shutter' mode where u can choose shutter speed from 1-15 seconds! Snap, snap and snap.. There comes most of the photo in FB album...

This is one of my better photo snapped using Canon IXUS 850:


Well, the downside of DC is ofcoz the image quality taken is not as good as Prosumer and DSLR in terms of exposure and noise performance. But if u cannot differentiate the quality/not so particular about the quality then its find. Inability in changin lens of coz would be de biggest limitation of DC.


Prosumer camera, or commonly known as semi-profesional camera. The word "ProSumer" suggest that it's used by Professional Consumer. Erm.. to me a professional is professional, but not a consumer anymore.. haha.. so oni those who has a higher requirements towards image quality than those DC rookies, but stil not PRO enough..

Prosumer lies between DC and DLSR. It has some advantages from the two, and also disadvantages of both. It offers more manual controls which is not available on DC, like aperture-priority, shutter-priority, depth of field priority. The image quality is better than DC as the lens has larger aperture and better sensor. The size of prosumer cam r generally smaller than DSLR, slightly bigger than DC.

Canon G11, the ultimate prosumer cam:
http://www.dcviews.com/press/images/canon-g11.jpg
image from: http://www.dcviews.com/press/canon-g11.htm

The downside is, the mounted lens cannot be change like DSLR. There is no manual focus for prosumer cam too, which is an important property for producing better image. The lower price is more expensive than most DC, and the expensive ones can easily by-pass entry level DSLR. Conclusion is, its not supreme in function wise, but the mobility and pricing are also not an advantage over DC. It'd be hard for some to choose prosumer, as the lower priced prosumer r not worth buyin compare to high-end DC wit similar function and price, then the higher level prosumer r not comparable with entry level DSLR.


Then the DSLR. A digital single-lens reflex camera (digital SLR or DSLR) is a digital camera that uses a mechanical mirror system and pentaprism to direct light from the lens to an optical viewfinder on the back of the camera. (from wiki)

Too complicated?
In simple, DSLR is a digital cam that looks more pro than the others... haha.. Tats wat you're telling others when u're holding tis kind of cam. Hahahaha..

Well, the advantages of DSLR had also been mentioned above. Better image quality (as better sensor provided), more manual controls to gif better image, ability to change lens, look professional.. Actually the advantage of DSLR is due to its sensor and lens. I wont explain on sensor as i m not clear of it myself too. For lens wise, i can tell u tat many lens r specifically designed for specific use. There are lens specifically for taking portrait(the prime lens), sports photography(zoom lens), macro/micro(wide lens) etc.. U can suite urself to take better photo wit a proper lens of ur choice. Ability to manually focus the image is also a big advantage, as u can blur out background to extrude ur object/ focus on things which are hard to the camera to autofocus.

Canon EOS 1000D, my 1st and oni DSLR..
http://www.wired.com/images_blogs/gadgetlab/1000d.jpg
image from www.wired.com/gadgetlab/2008/06/canon-announces/

Ofcoz, better quality=higher price, DSLR is more expensive than the two categories. It can ranges from RM1.8k to more than RM30k!!(as far as i noe la..) (i bet there r some cam which is more expensive!) The size of DSLR is also bigger. Manual control meaning more difficulties in balancing various factors to produce good photo. The biggest downside is, once u r into it, u wil be spending more on lens, external flash, battery grip, filters, hood, then better camera, lens.. the vicious cycle nv ends.. haha..

Below r some links to the official webpage of digital camera companies in m'sia. If u r interested, u can read the specification of each camera there! Enjoy!


Read more...

Monday, January 11, 2010

About ISO

I am a very practical person, so all my blog entries wil oni touch lightly of the theory, but more into making ppl understand the very basic of photography. All the words/terms/jargons wil be as simple as possible in order for all to understand. (the truth is, me myself oni noes about the simple things too.. :-P)

Wat is ISO in photography?
In photography, ISO refers to the sensitivity of film/camera sensor to light. In the 'ancient' time, photographers used films of various ISO in different condition. In simple, during a sunny day film wit ISO 100 will be used while taking photo indoor needs film wit ISO 400 and above. The cumbersome of changing films in different situation has been made easier as ISO can be switched within a few touches on the camera. However in both cases, higher sensitivity (higher ISO) leads to reduced image quality. A photo taken using high ISO wil haf increase noise/film grain.

The two photos below were taken using P mode (camera decides both shutter and aperture to achieve proper exposure, the normal brightness).

Photobucket
ISO 100

Photobucket
ISO1600

Photobucket
Direct comparison of magnified area. Left: ISO 100; right: ISO 1600

Try to observe the magnified area in both photo. Photo wit ISO 1600 looks more grainy/wit more noise than ISO 100. If u observe clearly, u would see spots in the magnified ISO 1600 but it is more smooth in ISO 100. In normal cases, image quality in ISO 100 would most certainly be preferred by all (except for Lomography).

If the image quality of photo taken wit ISO 100 is better than ISO 1600, then why is ISO 1600(or high ISO) invented?
Well, u had probably noticed in the exif of the photo, ISO 100 had a slower shutter speed (1.3s) then ISO 1600 (1/15s). In low-light situation, ISO 100 requires a slower shutter speed as the light sensitivity is low. Longer shutter time leads to hand-shake(witout the use of tripod) or motion-blur. Higher ISO can be used to increase shutter speed and hence reducing hand-shake/motion-blur.

Conclusion:
low ISO>>>>slower shutter speed + high image quality
high ISO>>> faster shutter speed + lower image quality

Balance between ISO and image quality muz be achieved and tis normally depends on the requirement of photographer and the purpose of the image is taken.

Tats all for today lo! Any question?
Read more...
Shutter and Aperture

Well, it seems like i received some favourable comments towards my blog about the basic knowledge of photography written in chinese. Some even suggested me to write in English as some of the terms/jargons are easier to understand in english. And so this blog was wrote..

Why suddenly i started writing tis kind of blog?
One day i was playing wit my DSLR while my gal gal chatting wit her frens. I played played played then suddenly had the gush of writin tis kind of basic photography knowledge in my blog so tat all my frens can learn bout it. So, if u dun haf a camera, go n buy 1.. if u ady own a point n shoot camera, upgrade it into a prosumer cam.. if u do haf a prosumer cam, upgrade it to DLSR!!! And canon better! As i can share ur lens, flash and evything.. hehe..

In this post, i wil be introducing shutter and aperture.

Wat is shutter?
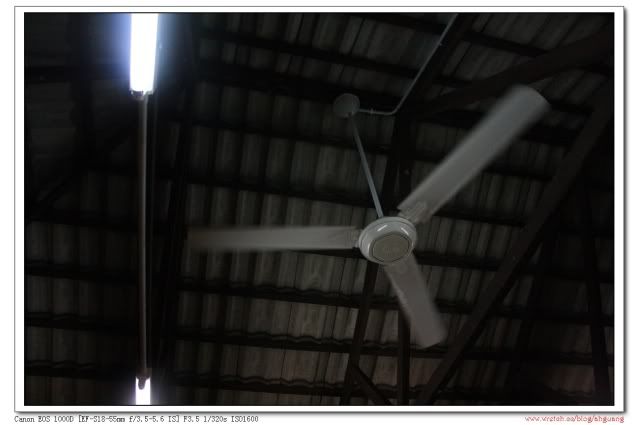
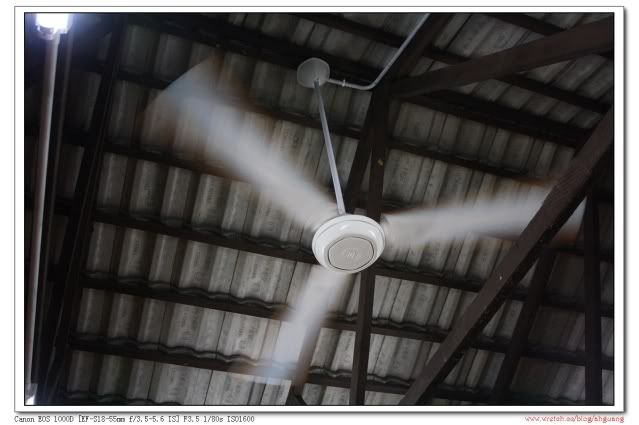
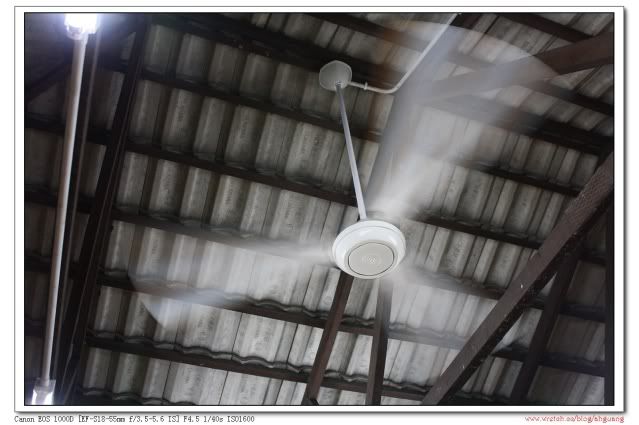
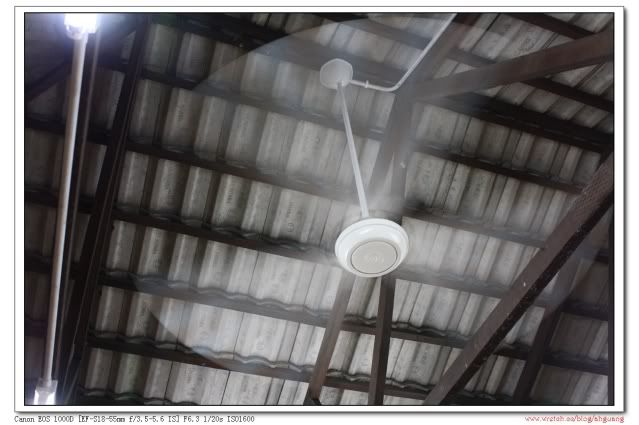
Shutter acts like a gate that controls the passage of light into the camera. By controlling shutter speed, u can control how long the shutter is opened or closed, thus controlling the amount of light entering the camera. The slower the shutter speed, more light wil be permitted into the camera, and as a result the photo taken wil also be brighter. Other than using shutter speed to control the exposure of a photo(brighter or darker), shutter speed can either be used to freeze movement or creating dynamics in a shot. Erm, i think it can be explain better in photo than words, lets look at some examples below.

The photos below was taken using TV mode(a mode that allows u to control the shutter speed where the camera wil accomodate the aperture):

Photobucket
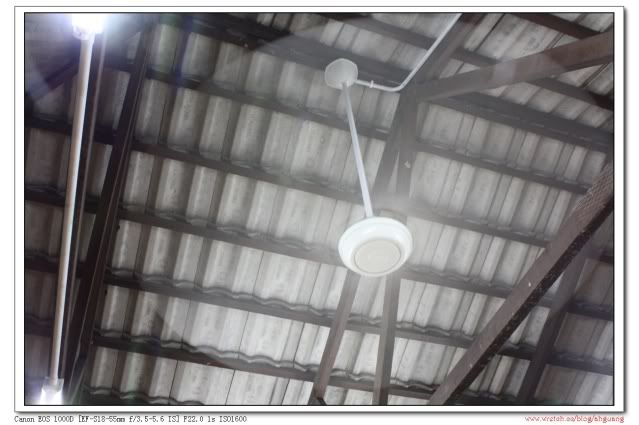
As shown in the exif(exif shows the info of the photo, ie. model of the camera, lens, aperture, shutter and ISO) of the photo, the photo was taken wit shutter 1/320(shutter opened for 1/320 second). U can notice tat the movement of the mocing fan blades were frozen. The shape of the blades can be seen quite clearly.

Photobucket
S/P: 1/80s

Photobucket
S/P: 1/40s

Photobucket
S/P: 1/20s

Photobucket
S/P: 1s

Noticed the diff between the photos?
Yup, the fan blades became blur, but the dynamics increase, letting u noe tat the blades are moving fast.
Can think of any use for long shutter?
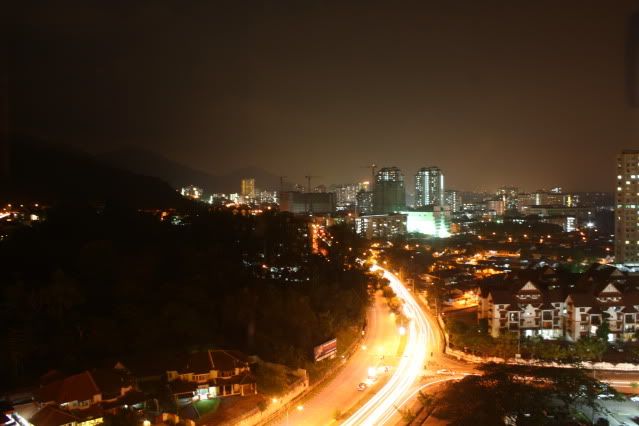
Photobucket
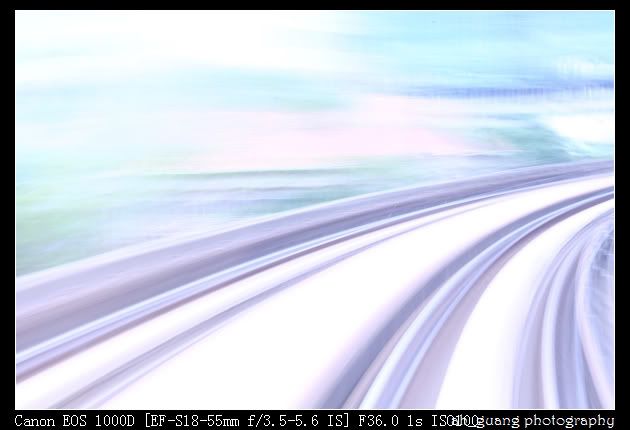
For example, tis photo, wit a long shutter, the light of car passing thru became a line of interesting light.
use ur creativity! ur imagination! Many stunning photo can be produce wit tis effect!

Next, aperture.
An aperture is a hole or an opening through which light travels. It controls depth of field, sharpness of the image and working together with shutter to control exposure.
Complicated?
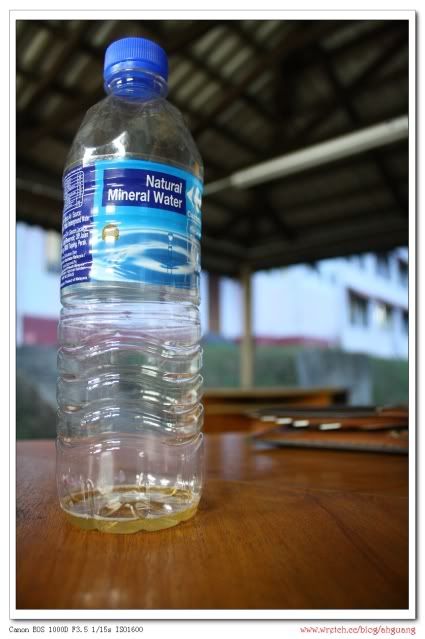
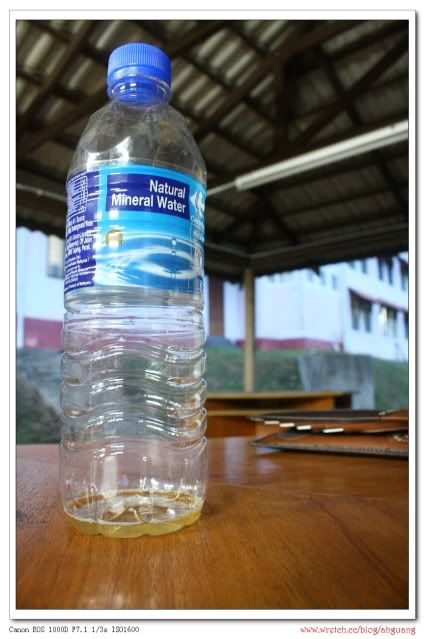
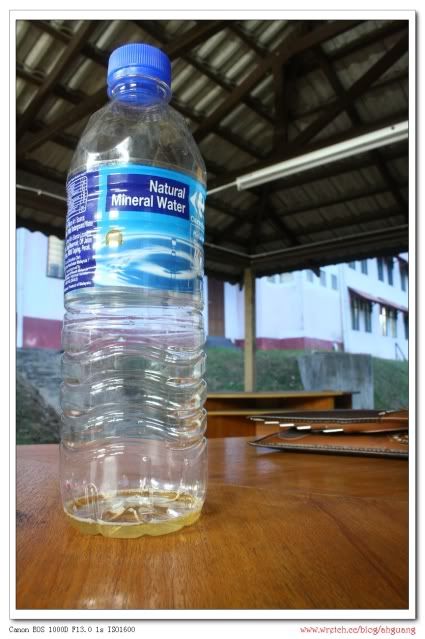
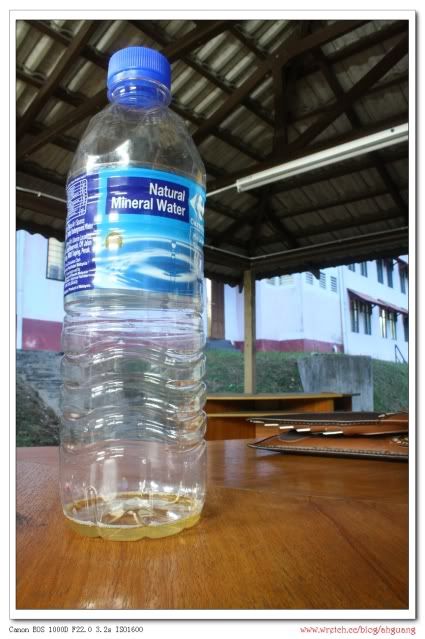
Again, observe the photos below which were taken using AV mode(controls aperture). My camera focus in on the water bottle, but try to observe about the sharpness of the purse and the fluorescent light behind.

Photobucket
Aperture: F3.5 (the smaller the digit, the larger the aperture opening)

Photobucket
Aperture: F7.1

Photobucket
Aperture: F13

Photobucket
Aperture: F22

The fluorescent light and purse looked sharper when the aperture is smaller(big F value). Normally if u like to take scenaries, the aperture is best at F8 and above, then all the scenes wil be sharper.
In the case of portrait, photographers prefer bigger aperture(small F value, normally
Tats all for today! Class dismisses!!!

p/s: sorry tat my english and photos sucked..


Read more...
Related Posts with Thumbnails